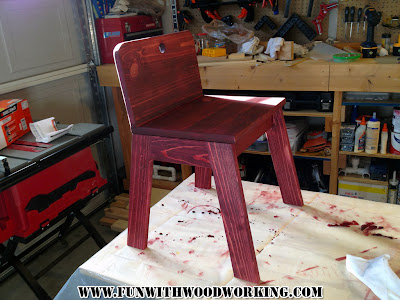
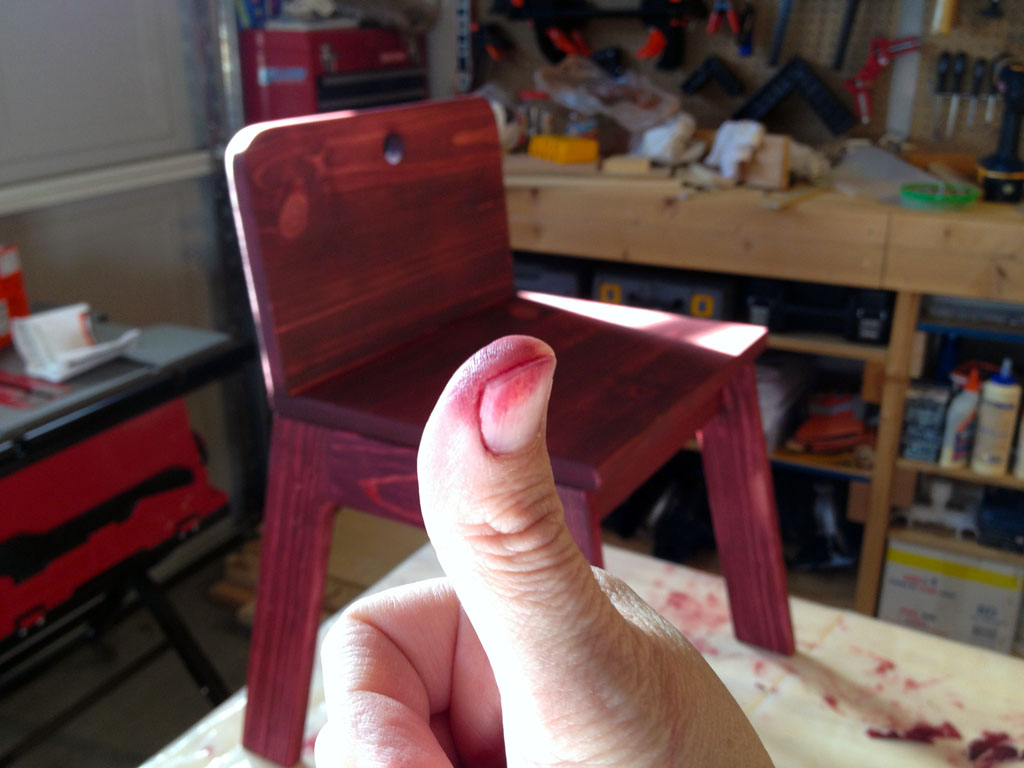
The first thumb chair is done!
I finally finished the first thumb chair! Why do these projects always seem to take so long?
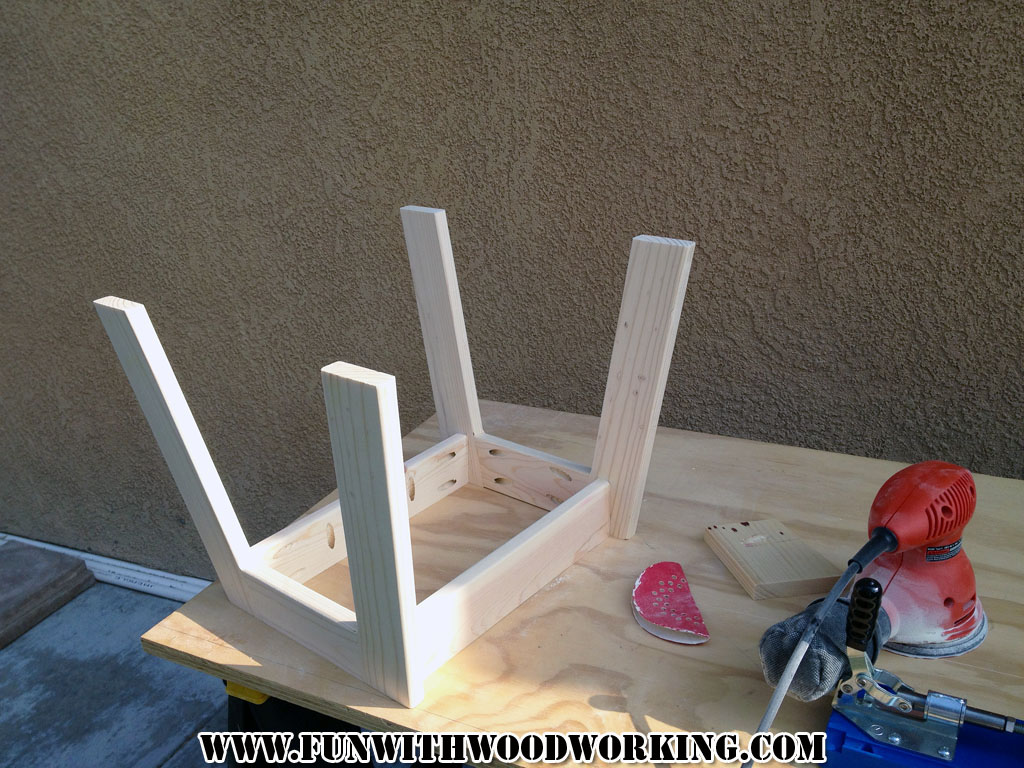
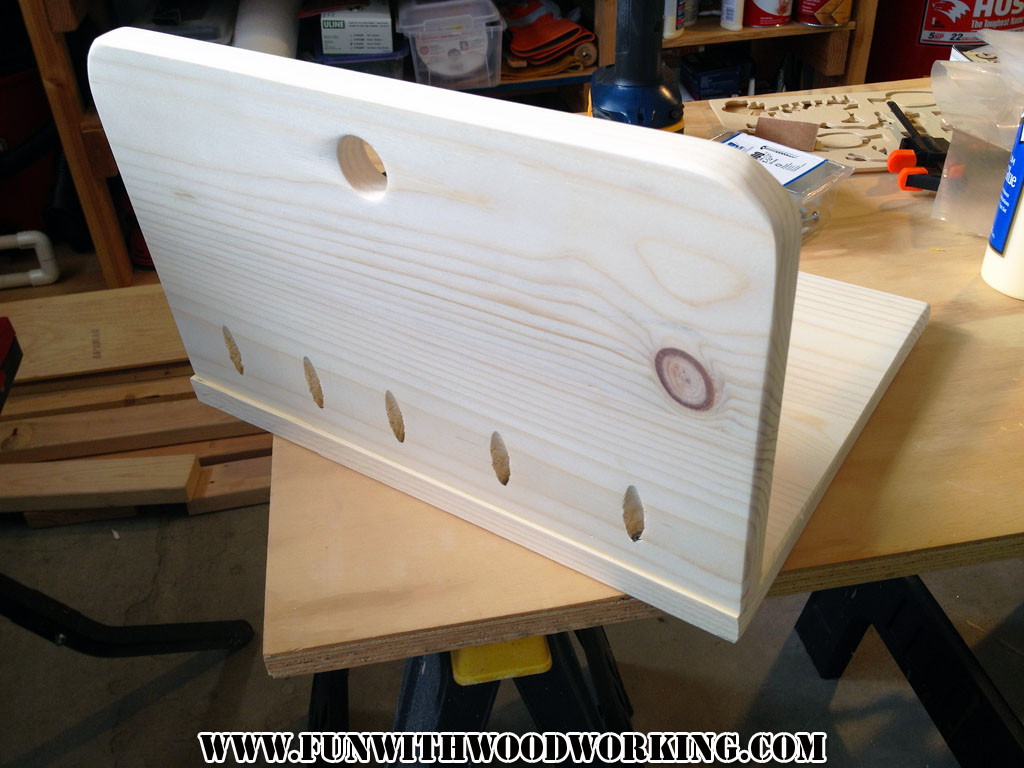
I forgot to put the pocket holes for the seat in when I cut the pieces to length so I added them here.
The plan called for 4 pocket holes for the seat back but I put 5 to play it safe.

I drilled a 1 inch hole in the seat back for a thumb.

Here is the hole sanded smooth.

Time for some finish sanding
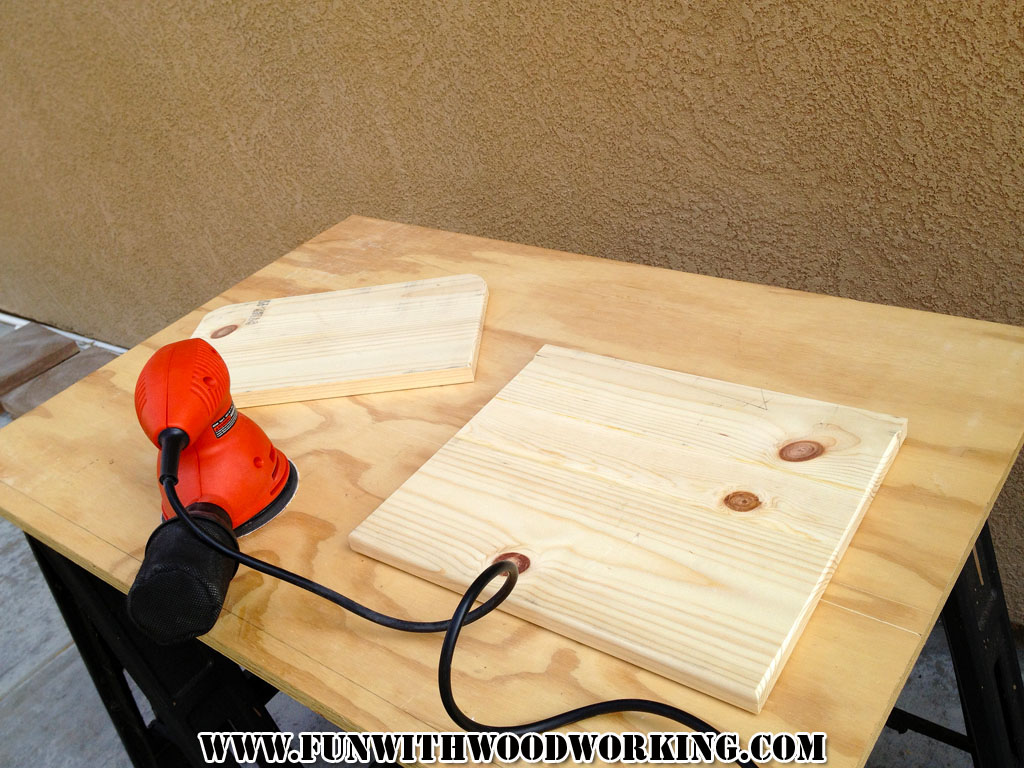
And more sanding….
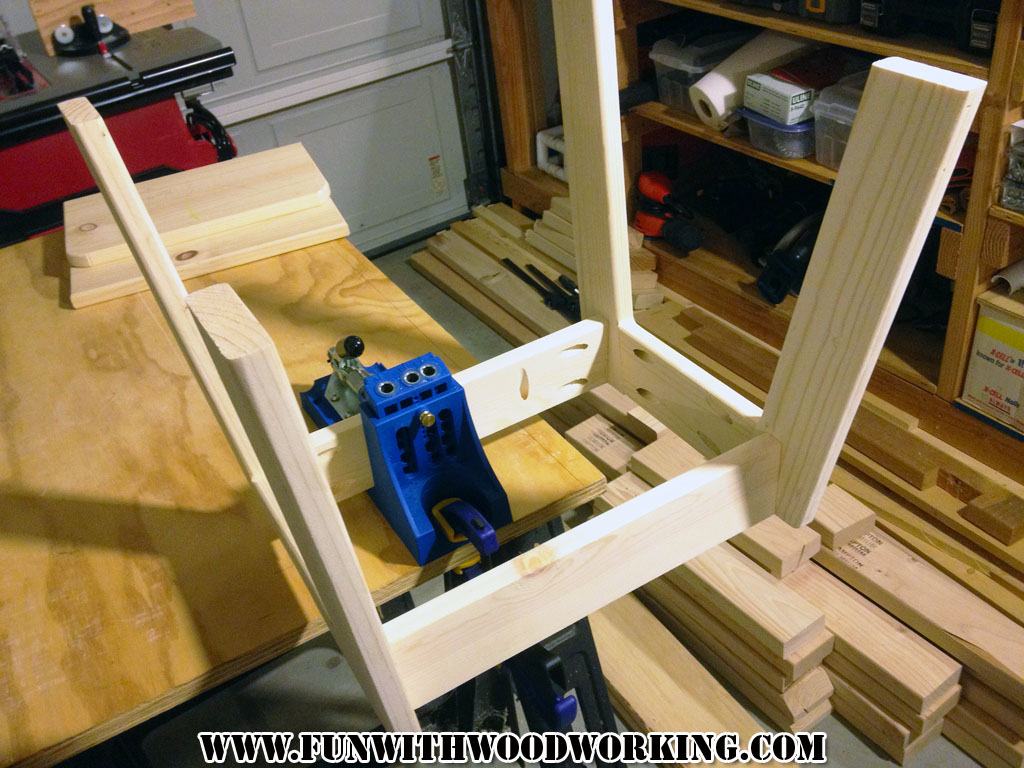
I couldn’t think of a good way to clamp the 2 pieces together and like always
my piece drifted a little bit when I screwed it together. I thought of a possible way
to clamp it for next time so we will see if that works better on the next one.
The 2 pieces are ready for assembly!

I centered and clamped them and then screwed them together. No glue.

Here is the chair ready for stain.

Here it is stained. If you have seen any of my other kid projects then you know
that I used the same stain to try and make them all match.
that I used the same stain to try and make them all match.

Somehow, I always manage to blow out the thumb on the glove on my right hand
when I stain projects.
when I stain projects.
1st coat of poly applied.

I let it sit over night and then gave it a light sanding and applied the second coat.

3rd coat of poly applied and it is ready to go in the house!

I put some self adhesive felt pads on the bottom of the feet. I don’t know if they will last
but it is worth a try. I forgot to mention it above but I also put 2 coats of poly on the bottom
of the chair as well.
but it is worth a try. I forgot to mention it above but I also put 2 coats of poly on the bottom
of the chair as well.

All ready for my 2 boys to start fighting over. I better get the second one done quick!

This is post 3 of a 3 part series.
You can read part 1 here:
http://funwithwoodworkingtoo.blogspot.com/2013/01/lets-make-thumb-chair.html
http://funwithwoodworkingtoo.blogspot.com/2013/01/lets-make-thumb-chair.html
and part 2 here: